Disposal Planning for DIY Projects That Create Heavy, Bulky, or Awkward Debris

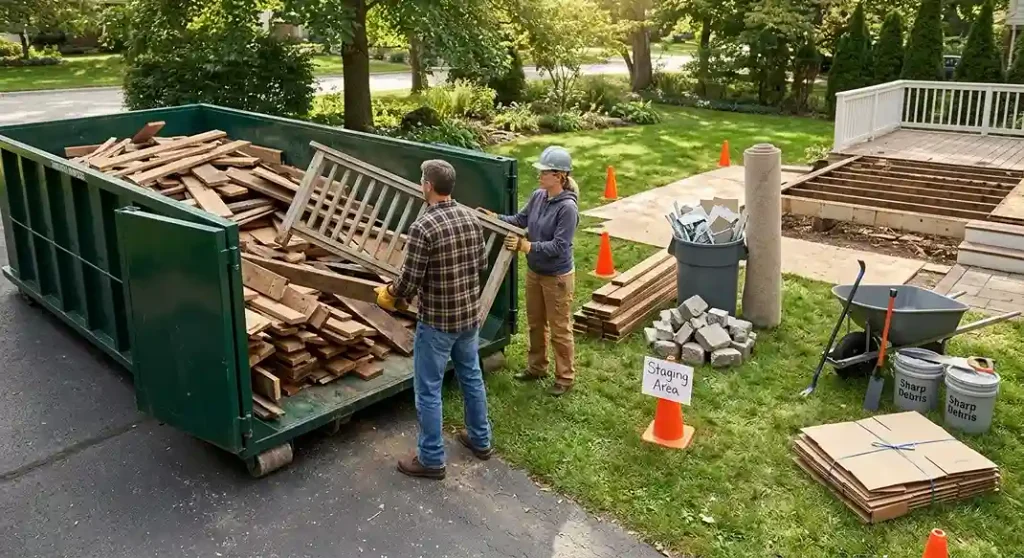
DIY home improvement projects often begin with excitement about the finished result. A cleaner garage, updated bathroom, removed deck, new flooring, opened-up room, or refreshed outdoor space can feel worth the effort. The harder part often appears once old materials start coming out. Heavy, bulky, and awkward debris can quickly turn a weekend project into a messy, frustrating cleanup.
Disposal planning helps homeowners avoid that problem. Before removing the first cabinet, tile, board, fixture, or section of flooring, it helps to know what will be removed, how it will be carried, where it will be staged, and how it will leave the property. A better waste plan keeps the project safer, cleaner, and easier to finish.
Start by Identifying the Debris Type
Not all DIY debris is the same. Some materials are heavy, some are bulky, and some are awkward because of their shape. A bathroom project may create tile, drywall, a vanity, a toilet, a tub surround, and old flooring. A deck project may create long boards, railings, posts, fasteners, concrete footings, and rotted lumber. A flooring project may create carpet rolls, padding, tack strips, laminate, tile, or underlayment.
Before work begins, list the main materials that will come out. This helps you understand whether the project will produce dense debris, large pieces, sharp scraps, or mixed materials. It also helps you decide whether regular trash service is realistic or whether a larger disposal option makes more sense.
A project feels more manageable when you know what kind of waste you are dealing with.
Estimate Volume and Weight Separately
Homeowners often estimate debris by how much space it will take up. That matters, but weight can be just as important. A pile of old carpet may take up a lot of room but be lighter than tile or plaster. Concrete, brick, stone, wet drywall, roofing materials, soil, and masonry can become heavy long before they look like a large pile.
Think about volume and weight as two different planning details. Bulky items may need to be broken down so they fit better. Heavy items may need smaller loads, staged removal, or careful loading. A container that looks only half full may already be carrying a lot of weight if it contains dense materials.
Planning for both size and weight helps prevent mid-project surprises.
Decide on Disposal Before Demolition Starts
One of the most common DIY mistakes is tearing everything out first and figuring out disposal later. That usually means debris ends up in the garage, driveway, basement, side yard, or spare room. Once it is piled there, it has to be moved again.
A better approach is to choose a disposal method before demolition begins. Smaller projects may work with curbside pickup rules or local drop-off options. Larger projects may benefit from a dumpster placed on-site. Working with Temporary Dumpster can help homeowners coordinate a dumpster rental around projects that create heavy, bulky, or awkward debris.
The goal is simple: remove materials once and move them directly to the right place.
Choose a Practical Staging Area
Even with a dumpster, you may need a temporary staging area while you work. This is especially true if you are removing materials from multiple rooms or carrying debris down stairs, through a garage, or from a backyard. A staging area gives you one controlled place to sort and gather materials before loading.
Choose a spot that does not block everyday access. Avoid placing debris in front of doors, garages, walkways, mailboxes, driveways, stairs, or areas used by children and pets. If the project will take several days, keep the pile neat and contained so it does not spread.
A good staging area keeps the rest of the property usable while work continues.
Create a Clear Debris Route
A debris route is the path materials take from the work area to the disposal point. This may run through a hallway, basement stairway, porch, garage, yard, side gate, driveway, or patio. Heavy and awkward materials are harder to carry safely when the route is cluttered.
Before removing materials, clear the path. Move rugs, cords, tools, boxes, furniture, planters, toys, and loose items. If debris will pass through finished areas, protect floors, corners, doors, and trim. If the route includes stairs, make sure you have enough help and a safe way to carry heavy items.
A clean path reduces damage and makes each load easier.
Break Down Bulky Items When Possible
Bulky debris can fill a disposal area quickly. Cabinets, shelving, furniture, built-ins, doors, fencing, deck boards, pallets, and large boxes often take more room than necessary if they are tossed in whole. Breaking them down can save space and make them easier to carry.
Remove drawers, doors, shelves, hardware, and loose trim before loading large pieces. Cut long boards into manageable lengths when it is safe to do so. Flatten cardboard and packaging as materials arrive. Stack flat pieces carefully instead of throwing everything into a tangled pile.
Breaking down debris takes extra time, but it usually saves effort later.
Handle Awkward Materials with Care
Some debris is awkward because it is long, sharp, flexible, fragile, or uneven. Examples include carpet rolls, long trim, mirrors, glass shower doors, fencing, gutter sections, paneling, drywall sheets, old doors, pipe, wire shelving, and countertop pieces. These materials can be hard to carry and easy to drop or scrape against walls.
Move awkward items slowly and plan each turn before carrying them. Use two people when needed. Wrap or tape glass and mirrors carefully, and keep sharp edges contained. Do not lean long or unstable items where they can fall into a walkway.
Awkward debris can cause damage even when it is not especially heavy.
Plan for Sharp and Small Debris
DIY projects often produce small hazards. Nails, screws, staples, tack strips, tile chips, splinters, broken glass, metal brackets, wire ends, and drywall pieces can spread across the work area. These items may not fill a dumpster, but they can injure people or damage tires, floors, and shoes.
Keep a bucket, heavy-duty bags, or small container nearby for sharp and loose pieces. Sweep as you work instead of waiting until the end. If carpet or flooring removal involves tack strips, collect them right away. If you remove trim or wood with exposed nails, handle it carefully before carrying it through the house.
Small debris control makes the entire project safer.
Avoid Overloading Yourself
Heavy DIY debris can lead to strained backs, dropped materials, damaged walls, and unfinished projects. Homeowners should be realistic about what they can lift and carry. A cast-iron tub, stone countertop, concrete chunk, heavy vanity, or wet material may require more help than expected.
Use smaller loads when possible. Cut or separate materials into pieces that can be handled safely. Use carts, dollies, wheelbarrows, straps, or ramps when appropriate. If something is too heavy, do not force it just to save time.
A safer pace is better than turning a cleanup project into an injury.
Sort Materials as You Work
Sorting does not have to be complicated. Keep reusable items, metal pieces, cardboard, general debris, and questionable materials separated when practical. This helps prevent useful items from being damaged and keeps the cleanup from becoming one mixed pile.
Some items should not be casually tossed into general debris. Paint, chemicals, fuel containers, batteries, propane tanks, pesticides, oil, electronics, and unknown containers may need special handling. Set them aside and check local disposal rules.
Sorting as you go is much easier than trying to separate everything later.
Protect the Home During Removal
Disposal planning should include protecting the home itself. Heavy and awkward debris can damage floors, trim, walls, stairs, doors, siding, landscaping, and driveways if removal is rushed. Even small scratches and dents can create repair work after the main project is done.
Use floor protection where needed. Remove doors from hinges if extra clearance is necessary. Cover corners or narrow turns if large items will pass through them. Keep debris away from finished surfaces and do not stack heavy materials against walls.
Cleanup should not create a second project.
Coordinate New Materials and Old Debris
Many DIY projects involve removing old materials and installing new ones in the same space. New flooring, cabinets, tile, fixtures, doors, trim, lumber, or appliances need clean staging space. If old debris is still in the way, installation can slow down before it starts.
Clear debris before major deliveries whenever possible. Keep new materials away from nails, dust, wet scraps, broken tile, glass, and bulky old materials. If a dumpster is being used, make sure service access stays open and the container is not blocked by supplies.
A clean staging area helps the project move from demolition to installation.
Build Cleanup Into Each Work Session
Waiting until the end to clean up often makes DIY projects harder. Debris piles grow, tools disappear, walking paths shrink, and the project starts to feel overwhelming. Instead, build cleanup into every work session.
At the end of each day, load debris, sweep paths, collect sharp scraps, organize tools, and check how much disposal space remains. If you finish one phase, reset the area before starting the next. This keeps the project safer and easier to restart.
A steady cleanup rhythm helps prevent delays and frustration.
Avoid Common Disposal Mistakes
One common mistake is underestimating debris from “small” projects. Removing one built-in, one bathroom floor, or one section of deck can create more waste than expected. Another mistake is placing debris where it blocks access or must be moved again later.
Homeowners should also avoid mixing everything together without thinking. Heavy materials, reusable items, sharp debris, and restricted materials should be handled intentionally. A better plan saves time and reduces the chance of damage or injury.
Disposal planning is essential for DIY projects that create heavy, bulky, or awkward debris. The work may begin as a home improvement project, but the cleanup can quickly become the hardest part if materials are not managed well.
By identifying debris types, planning disposal early, choosing a staging area, clearing a debris route, breaking down bulky items, handling heavy materials safely, sorting as you work, and cleaning up in phases, homeowners can keep projects under control. A thoughtful disposal plan helps the old materials leave the property efficiently so the improvement work can keep moving forward.
Related Articles
She holds advanced qualifications in Sociology, Anthropology, and Ethnic Studies, fields that focus on human cultures, traditions, migration patterns, and identity development across the world. Her expertise allows her to break down complex cultural topics into easy-to-understand articles that readers genuinely enjoy.
Over the years, Milana has researched hundreds of public figures, communities, and global ethnic groups, making her a trusted voice in the ethnicity niche. Her writing combines factual research, historical understanding, and modern cultural analysis to ensure every article is informative, reliable, and reader-friendly.
Her work focuses on:
* Ethnicity and ancestry research
* Cultural identity and heritage
* Nationality and family background
* Celebrity ethnicity breakdowns
* Global traditions and multicultural studies
Milana’s goal is to provide readers with authentic, well-researched, and trustworthy information while celebrating the diversity of cultures around the world. Through her detailed research and passion for cultural education, she continues to help audiences better understand ethnicity, heritage, and identity in today’s connected world.
- Larry Ellison Ethnicity: Jewish Mother and Italian Father - October 6, 2026
- Charlie Heaton Ethnicity: Nationality, Parents & Background - October 6, 2026
- Hilaria Baldwin Ethnicity: Heritage, Parents & Background Explained - October 6, 2026